

Disclaimer: none of the methods I discuss here works if there is encrypted data on the disk. Decrypting is a pretty broad topic to be included in this post. So, in my today’s article, I discuss how to retrieve data from the dead VM disk that is neither damaged nor encrypted.
That’s absolutely true that there are several disk types. They all are described here. I do not want to write much about them in this article as they have many things in common in terms of extracting data.
Wait, what a VMDK actually is?
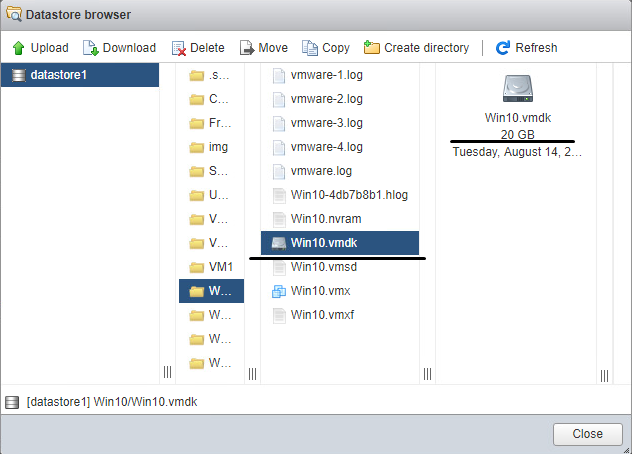
Well, first, let’s look under the VMDK hood. Each disk consists of two smaller files: the descriptor and the flat file. The former is nothing more than a text file viewable in any text editor. The descriptor keeps such parameters as IDS, virtual hardware version, and disk geometry. The *flat.vmdk file, in its turn, is where the VM data reside. In Datastore browser, both the descriptor and the *flat.vmdk are displayed as a single VMDK volume.
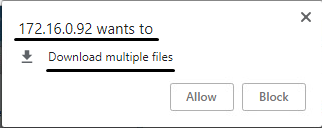
The only moment when VMDK content comes to the fore is when you download the file. Then, a message asking you to allow downloading multiple files emerges.
Locally, you can see both these files with their real size.

At this point, I’d like to mention that unless any of those guys works, none of the ways to extract VMDK file content described in my article works! Today I don’t look at those cases when you need to get your data back from the damaged files. I’ll teach you only how to extract data when you have a healthy VMDK yet you cannot start the VM for some reason. Also note that doing things I write here may be pretty risky as most of the methods I discuss today allow you to access a VM disk as a read-write volume. Be careful and do not blame on me if you do screw things up!
Ok, with that being said, let’s now look at how you get your data. There are two types of methods for doing that: methods allowing to modify the disk content (mounting VMDK as a read-write volume) and methods exclusively for data recovery (opening the file as a read-only volume).
Mounting the disk as a read-write volume
Just add the VMDK to another ESXi VM
Well, that may sound a bit trivial, but why you just don’t connect the VMDK to the healthy VM? Connecting the disk to another VM, for my money, is the easiest and the most reliable way to get your data. If you have enough resources on the ESXi host, or if you just can use one more server, do not invent the wheel and add the VMDK to another VM. Note that the healthy VM should have exactly the same OS as the dead one to prevent any formatting incompatibility issues. In this article, all disks are formatted to NTFS and I use Windows Server 2016 to orchestrate them.
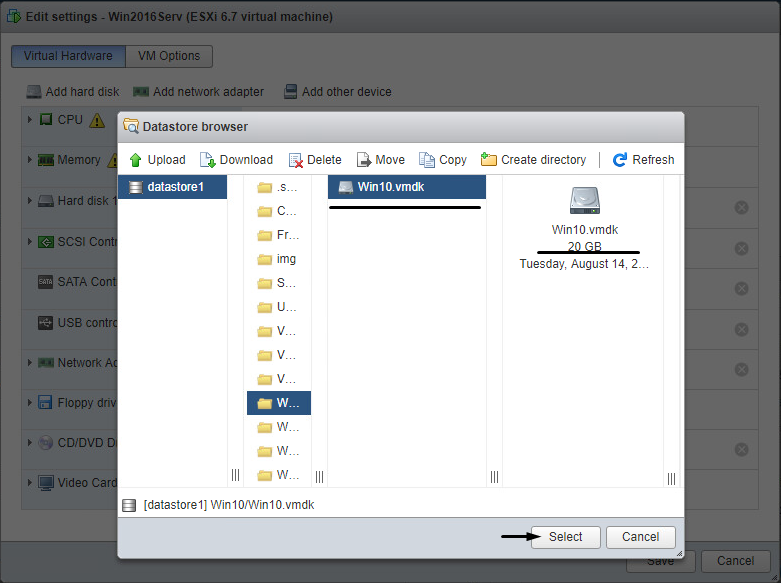
Ok, let’s start. Reach the host with ESXi Web Console to access the target disk. Remember, you can add the disk to the healthy VM on the fly.
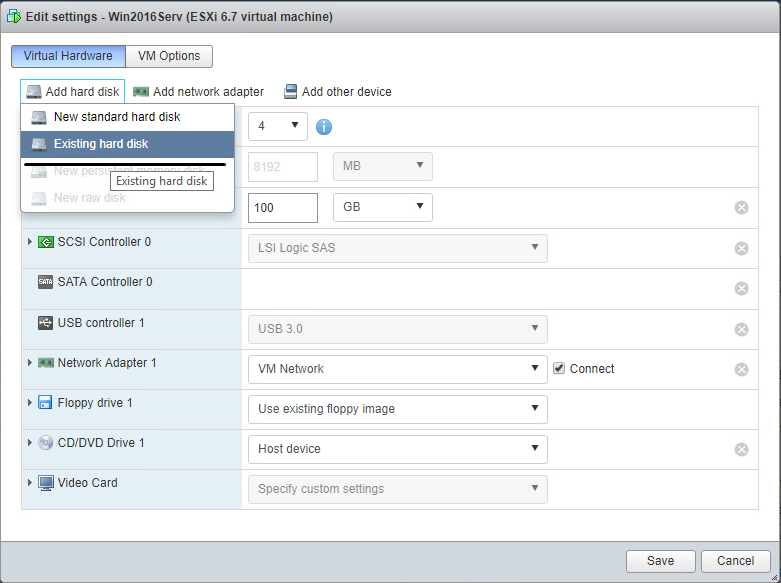
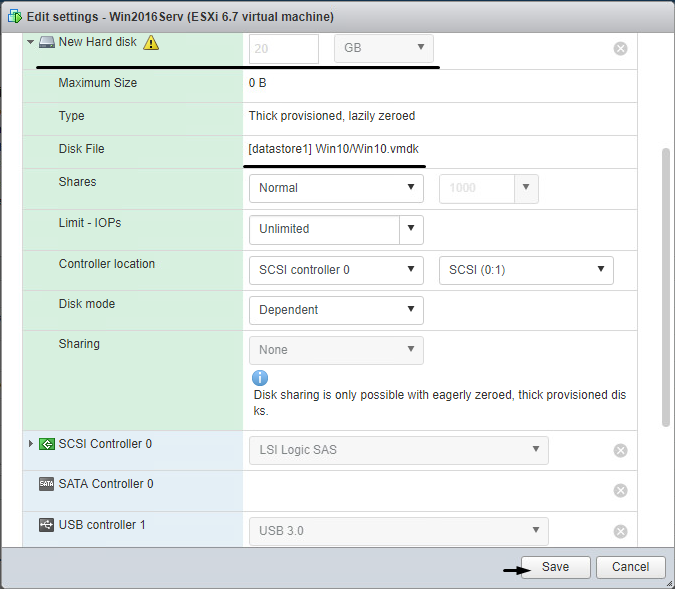
Specify the path to the VMDK and press Select. In my case, the disk is located exactly on the same host where the healthy VM resides. Well, honestly, that’s not smart to do anything with that VMDK, so make a copy of that disk and play around with the copy.
Check all the settings and press Save.
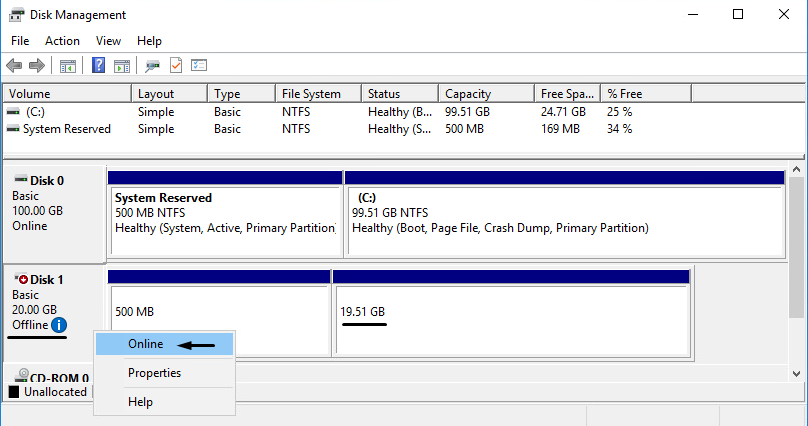
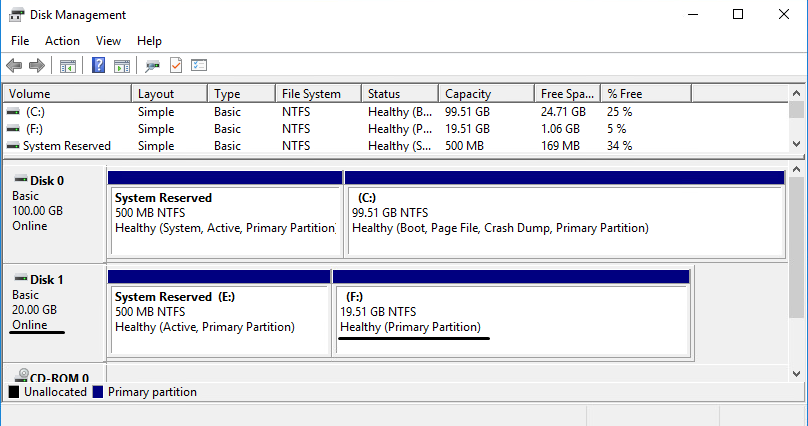
Go to Disk Management and bring the recently added disk online. Once again, the VM to which I’ve just added the disk is under Windows Server 2016 orchestration.
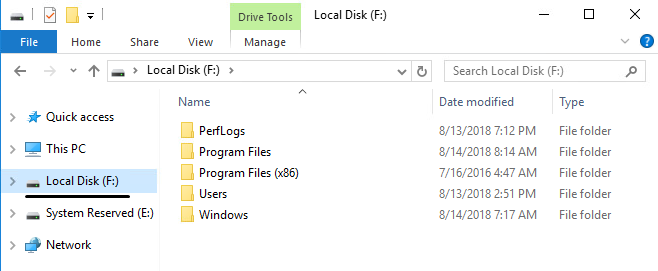
Now, in Windows Explorer, you can access the data. Keep in mind that you can alter or delete data since you use the VMDK as a read-write volume. You should really keep a copy of the disk just in case if you mess things up.
VMware Workstation
Another easy way to access the VMDK content is adding the disk to VMware Workstation. You can download VMware Workstation here.
Once you open VMware Workstation, go to the File menu and select Map Virtual Disks there.
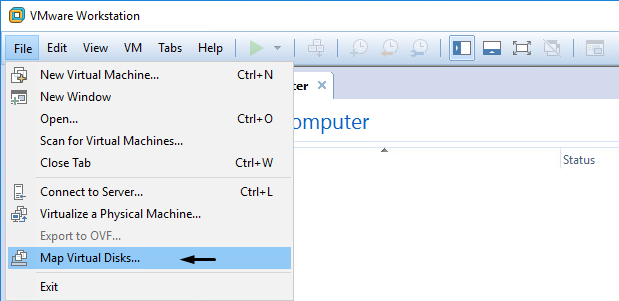
Next, press the Map… button.
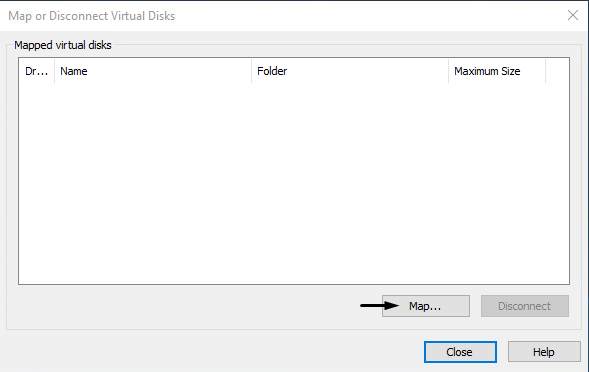
Before you start, download the VMDK. In the Map Virtual Disk menu, browse for the volume. Disable the read-only mode option and select the drive letter. Press OK to connect the disk.

VMware Workstation warns you about the risk of altering the disk content. Well, hopefully, you know what you are doing, so press Yes.

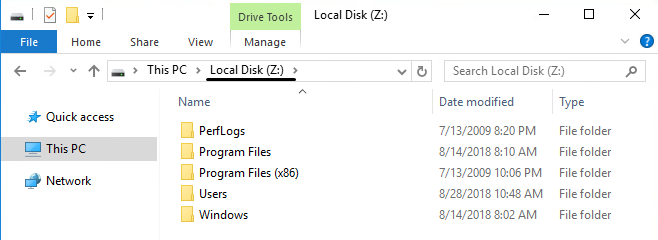
Windows Explorer is opened right after the disk is connected.
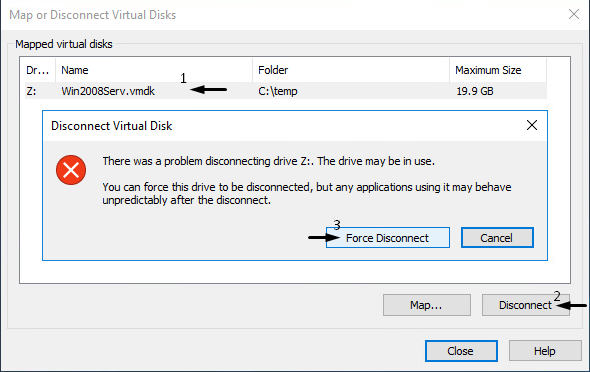
Once you are done with that disk, don’t forget to disconnect it. Here’s how you do that. Go to the Map or Disconnect Virtual Disks menu. Select the disk and press Disconnect. You’ll see the message preventing you from disconnecting the VMDK. It says that disk may be still in use and you should better think twice before disconnecting it. But, if you already got the necessary data and there are no applications that use data on the disk, press Force Disconnect.
VMware Virtual Disk Development Kit
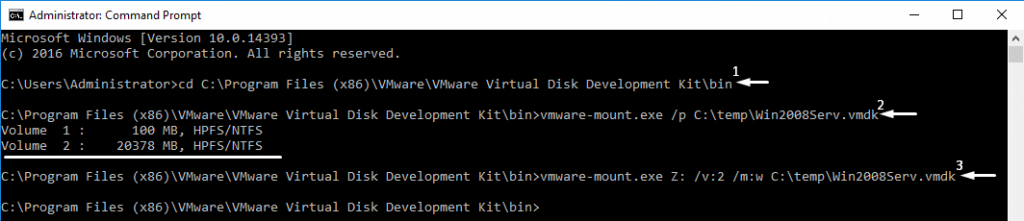
Now, let’s look at how you access the disk with VMware Virtual Disk Development Kit (VDDK). VDDK is a bunch of handy utilities for developers. vmware-mount.exe, the utility allowing to do some manipulations with VMDK, is among them.
First, download VDDK here. Note that you need the kit version to be older than 5.1. vmware-mount.exe is not included in the later kit versions. After installation, the utility will be available by default by the following path: C:\Program Files (x86)\VMware\VMware Virtual Disk Development Kit\bin. Now, run CMD.EXE and go to C:\Program Files (x86)\VMware\VMware Virtual Disk Development Kit\bin. Next, run the utility with the /p option and specify the path to the VMDK file (C:\temp\Win2008Serv.vmdk in my case).
See, the volume consists of 2 files. Obviously, you need the larger one (the second one in my case). So, assign the drive letter (I use Z: here) and type /v:2 to mount that volume. You need to mount the file as the read-write volume, so add /m:w before the VMDK file path. You can also enable the nonpersistent mode to ensure that changes to the virtual machine disk are discarded once the VM powers off.
End the command with the path to the VMDK disk. In my case, the whole cmdlet looks like as follows:
|
1 |
C:\Program Files (x86)\VMware\VMware Virtual Disk Development Kit\bin>vmware-mount.exe Z: /v:2 /m:w C:\temp\Win2008Serv.vmdk |
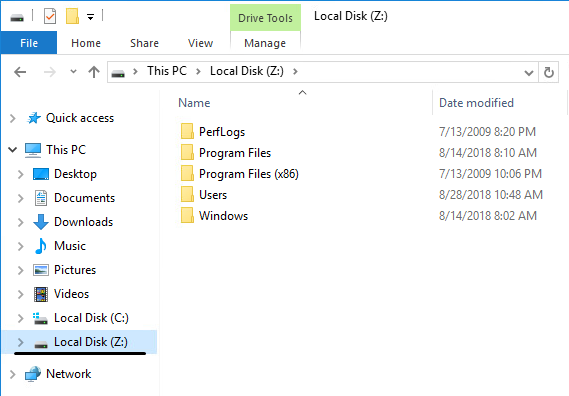
Once the disk has been mounted, open it in Windows Explorer.
Once you’ve finished, disconnect the VMDK. Type the disk letter and finish the line with /f. Note that system prevents you from any other way of disconnecting the disk as it is still in use.
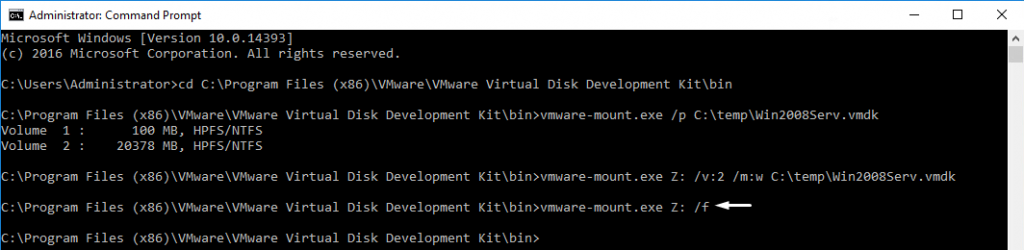
Keep in mind that there are far more options than I’ve mentioned in this article. You can find out more about them with the vmware-mount.exe /? cmdlet.
Methods exclusively for data recovery
7-zip
Another fairly simple way to access the VMDK is opening it as an archive with 7-zip. True, 7-zip is a powerful tool allowing you to do a bit more than just unpacking some archives. For instance, it allows opening a VMDK file as a regular archive. You can download that application from the official site. Opening the VM disk with 7-zip is good exclusively for data recovery since the archive is opened in the read-only mode. In other words, you can do nothing with the data. Now, let’s look at how actually you can get the data.
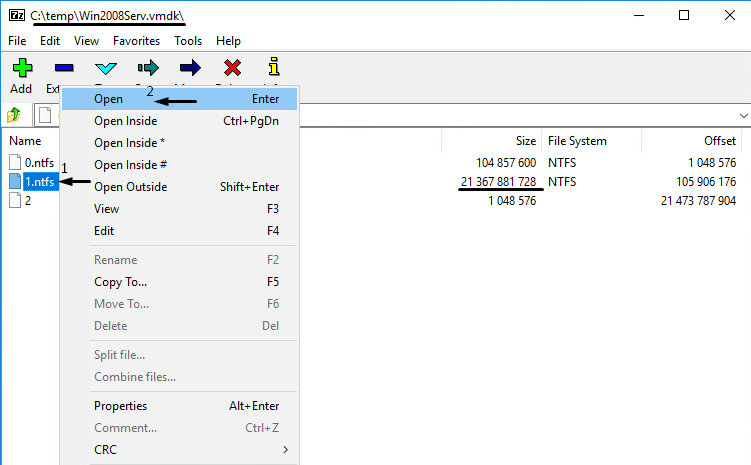
Download the VM disk and open the archive with 7-zip.
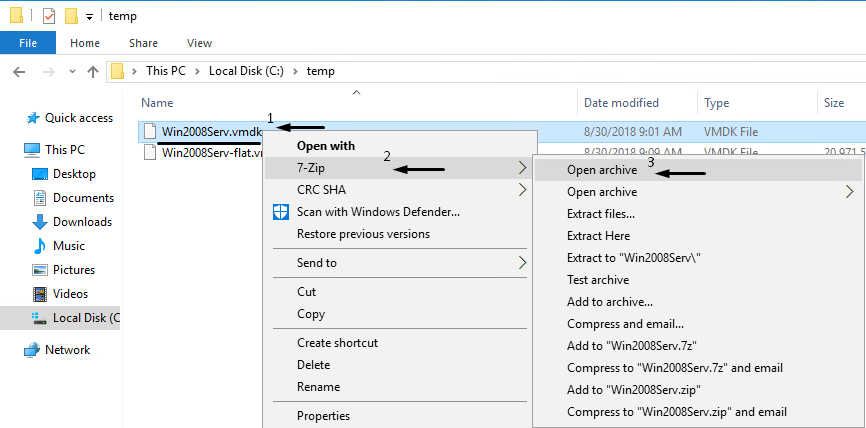
Next, open the larger file. In my case, it’s 1.ntfs.
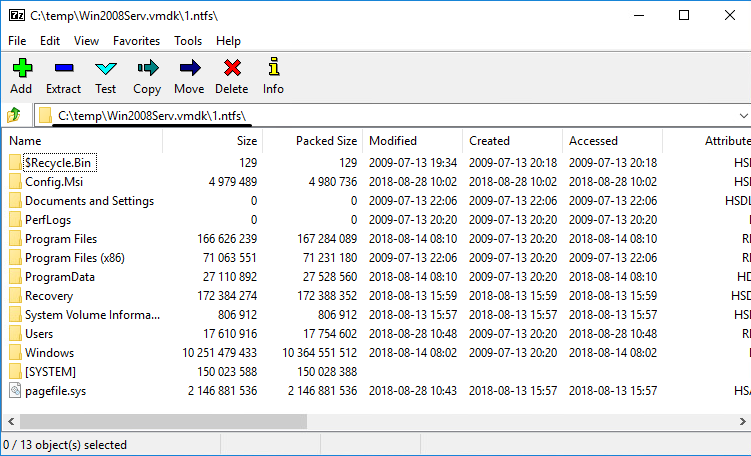
Here are the directories and files available on the disk.
Copy the data.
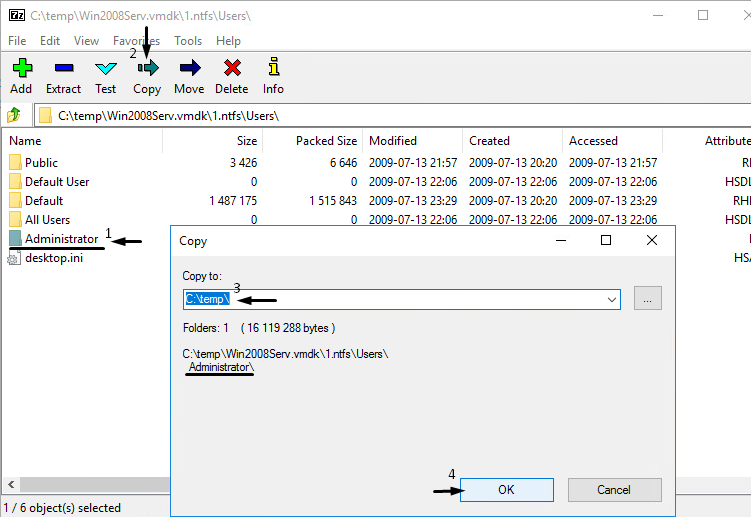
Doublecheck whether you retrieved all data.
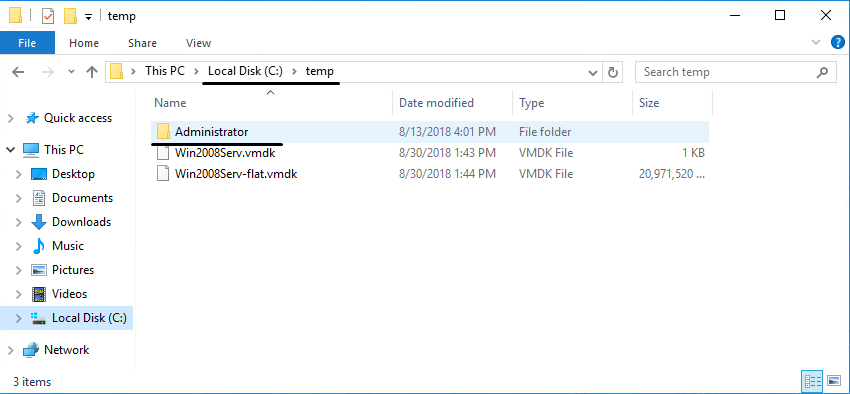
Eventually, once you are done with copying data, make sure that you exit the utility to avoid the disk being blocked till reboot.
Conclusion
In this article, I’ve discussed 4 the most useful ways to access the VMDK contents without powering on the VM. Well, you can find many other ways to extract a VM disk content, but the ones I discussed above, for my money, are the best. Once again, all the methods I discussed here work only if none of the VMDK volume components is corrupted. You may need some other things to do if any of those files is corrupted or encrypted. I wish you never be in the situation when you need any of the methods I describe here. Take care.
