

VMware Tools is a handy utility suite that makes your VMs run faster and dramatically simplifies their management on the whole. And, the nice thing is, it installs fairly easy on your VMware VMs regardless of their guest OS. Today, I’m going to talk about VMware Tools in general and how to install the package in different environments.
VMware Tools: What is it and what’s inside?
VMware Tools – a suite of utilities that enables you to squeeze some more performance out of your VMware VMs and make their management a breath. It is an image installed on any ESXi host that contains drivers, utilities, and all that stuff that’s vital to ensure proper communication between the host and the VM. It works for both x84 and x64 OS. For this article, I used VMware Tools 10.3.2 as that’s the most up-to-date software version so far.
The suite contains driver package replacing the ones supplied with guest OS. By this approach, VMware Tools makes your virtualization experience better. For instance, the package includes VMXNET 3 driver (emulates a 10 Gbit/s NIC), video card drivers (optimize screen resolution and color depth), and mouse driver (optimizes mouse functioning while working with a VM).
VMware Tools supports API frameworks. VIX (Virtualization Infrastructure eXtension) is one of those supported APIs. It allows managing IP that VM uses to talk to vCenter Server and synchronize VM time with the host time.
Starting from VMware Tools 10.0, you can easily update the suite. You can find out which exactly VMware Tools version is supplied with ESXi here.
Which VMware Tools version is installed?
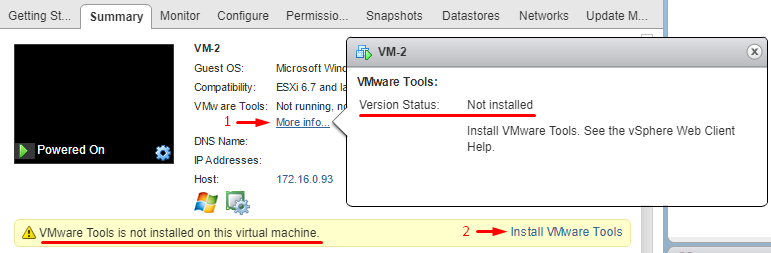
First, go to the Summary tab and press More info… to figure out whether you have VMware Tools installed. There, you can also find out the Tools version you use.
Here’s how the tab looks like in vSphere Web Client.

In my case, VM-1 has VMware Tools installed. If you do not have VMware Tools installed, you need to do that ASAP.
Installing VMware Tools
Installing VMware Tools on Windows
On Windows, that’s not rocket science to install VMware Tools. So, let’s start with Windows Server 2016.
First, go to the Summary tab and press More info… to learn whether the Tools is installed. Well, VM-2 does not have it yet, so I press Install VMware Tools. Actually, that’s how you start the installation process regardless of guest OS.
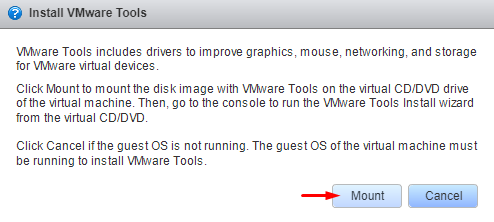
Next, confirm mounting the VMware Tools image by pressing the Mount button.
Now, go inside the VM and continue installation from there. The further installation process is individual for each OS I discuss here, but let’s finish first with VMware Tools installation on Windows!
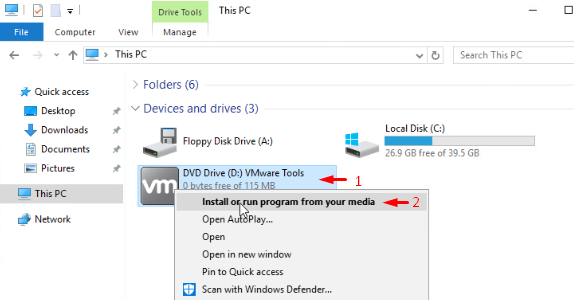
Remember that you have just mounted an image? So, go to Devices and drives, right-click it, and press Install or run program from your media.
Press Next.

Afterward, choose the setup type. You can just leave Typical as it set by default and press Next.

Click Install.

Press Finish.

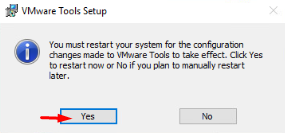
Now, reboot the VM by pressing Yes, and you are done with the suite installation.
Installing VMware Tools on Linux
For Linux family OS, there are at least two ways to install VMware Tools:
Open VM Tools (OVT) – popular among VMware admins open-source VMware Tools package. It is supplied with the most of modern Linux distributions. So, if you install one of them as a VM OS, the suite will already be there. The OVT source code is available in the GitHub repository, but only OVT supplied inside Linux distributions are supported officially.
Operating System Specific Packages (OSP) – the package that you can download from the official VMware website. Few use this method to install the Tools these days, but it is the only way to install the utility on old guest OS from Linux family.
Those packages are installed in different ways, let’s discuss some key moments.
Installing VMware Tools with OVT
From the top of my head, I recognized 3 tools to install OVT: apt-get, yum, and zypper. There are even more of them, but who needs that many methods to have such an easy thing done? In this way, I try out each of those 3 methods today on 3 following OS: Ubuntu Server 18.04.1 LTS, CentOS Linux release 7.5.1804 (Core), and SUSE Linux Enterprise Server 15. Spoiler: In Ubuntu Server and SUSE versions that I use today, VM tools are installed automatically right during OS installation. But, it is not a common rule for all versions of these OS! Or, there may something go wrong during installation so you may find OVT missing. That’s why I describe OVT installation process for both Ubuntu Server and SUSE here anyway.
apt-get. Ubuntu Server
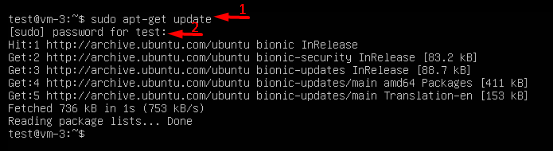
Before you use apt-get, update the installer repository. Note that you need an Internet connection and to elevate user privileges to do that. Run this cmdlet:
|
1 |
sudo apt-get update |
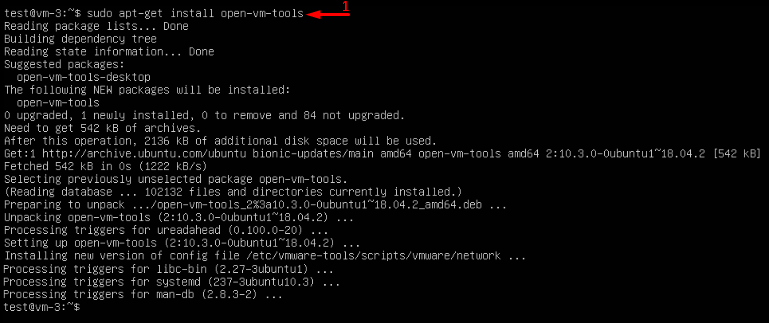
Now, install open-vm-tools itself.
|
1 |
sudo apt-get install open-vm-tools |
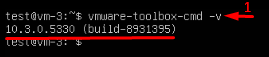
Deploy the following command to make sure that the toolbox has been installed:
|
1 |
Vmware-toolbox-cmd -v |
Eventually, reboot the host and VMware Toolbox is ready to use.
|
1 |
sudo reboot |
yum. CentOS Linux
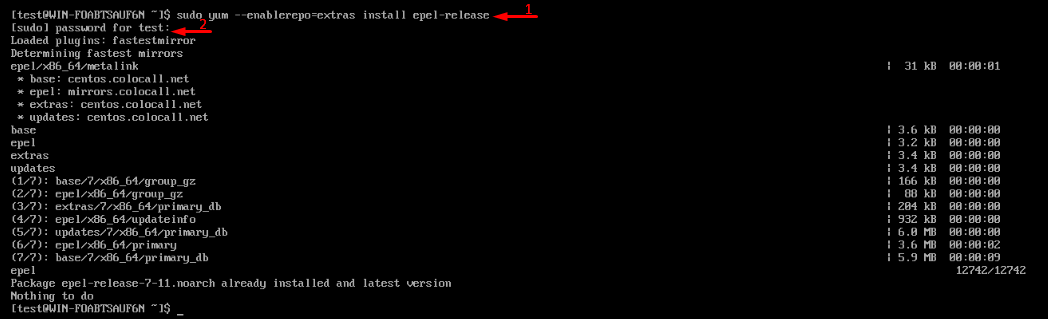
Access Extra Packages for Enterprise Linux (EPEL) packages providing access to the open repositories. Again, you need an Internet connection and root user privileges to have the job done.
|
1 |
Sudo yum - -enablerepo=extras install epel-release |
Now, let’s install OVT itself. After deploying the cmdlet, confirm downloading the package and its installation by typing y.
|
1 |
sudo yum install open-vm-tools |
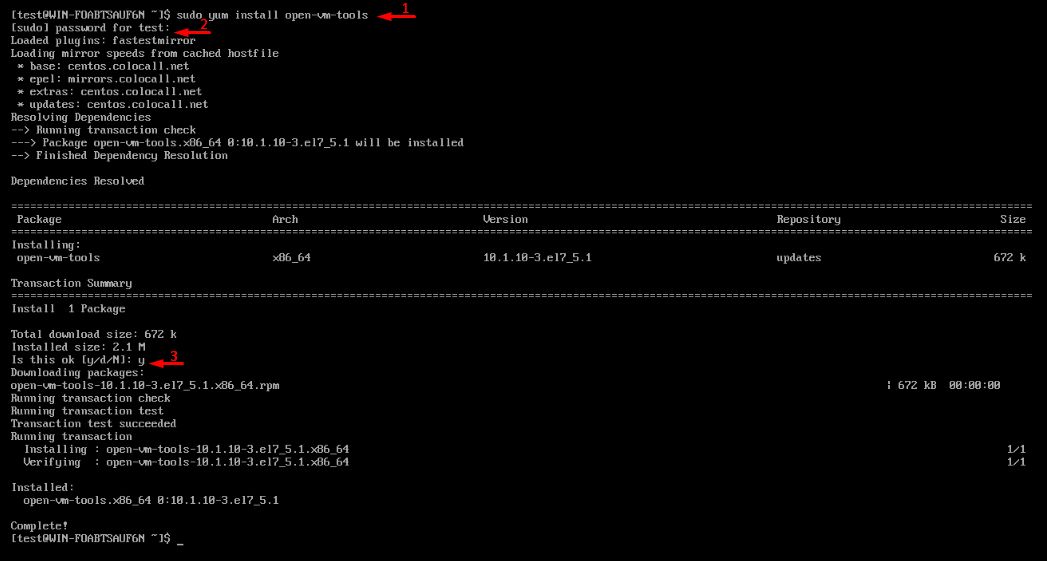
Make sure that installation has run smoothly.
|
1 |
Vmware-toolbox-cmd -v |

If everything looks good, type the following command to reboot the server:
sudo reboot
zypper. SUSE Enterprise Server
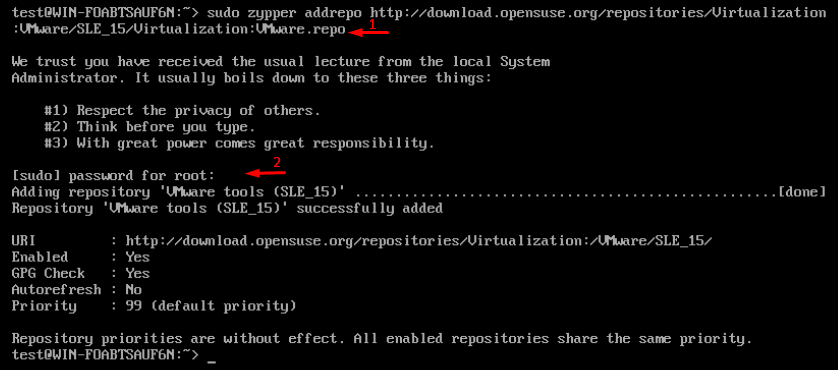
Add the link to the necessary repository. You need both Internet connection and elevated user privileges to download the package.
|
1 |
sudo zupper addrepo http://download.opensuse.org/repositories/Virtualization:VMware/SLE_15/Virtualization:VMware.repo |
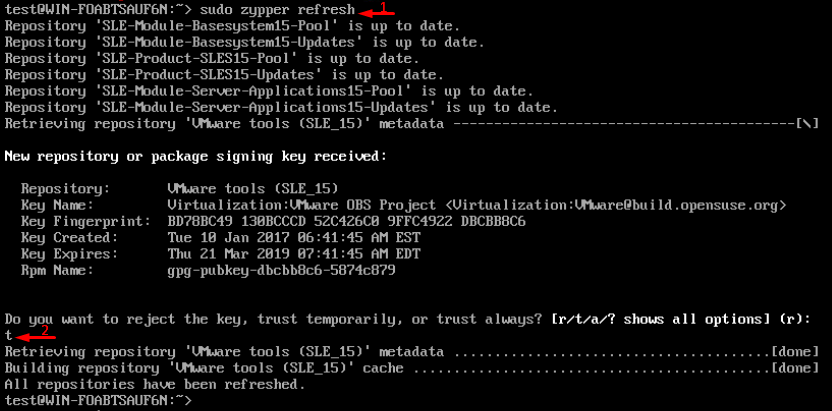
Update the installer repository and set it as a temporarily trusted one by pressing the t key.
|
1 |
sudo zipper refresh |
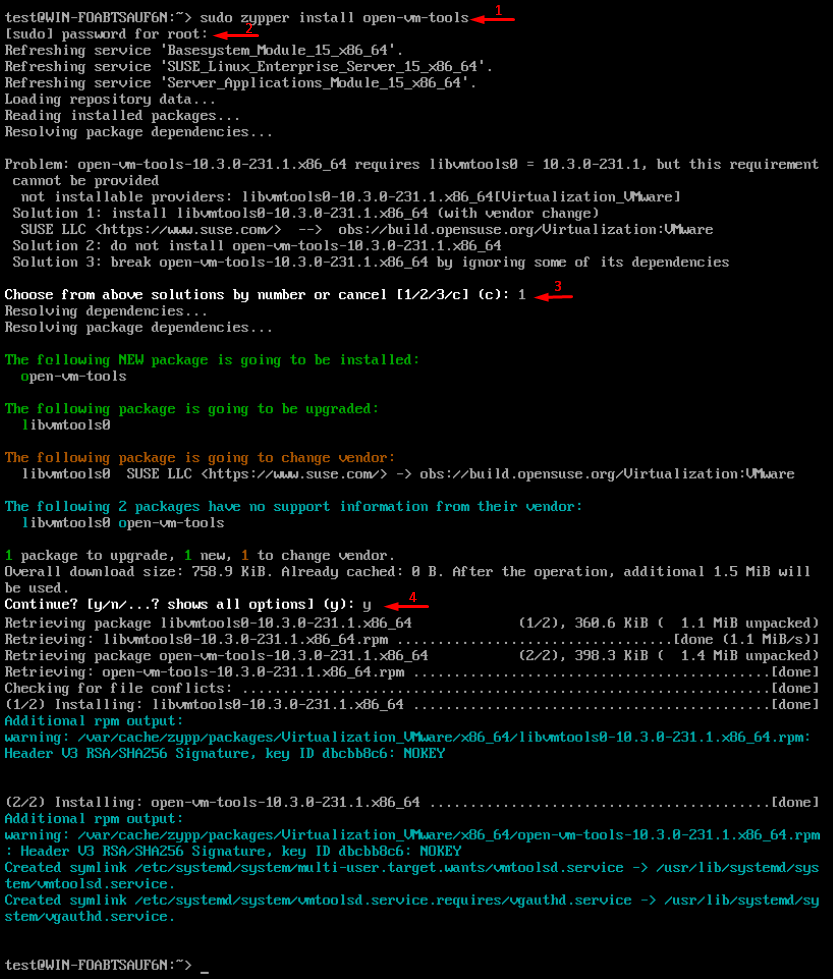
Next, install the OVT package. Type y to confirm download and installation. In my case, the libvmtools package was missing, and the installer offered to download it. Well, why not! I just typed 1 and had the package downloaded.
|
1 |
sudo zipper install open-vm-tools |
Check whether installation has run smoothly by typing this command:
|
1 |
Vmware-toolbox-cmd -v |

And, finally, reboot the server to finish installation.
|
1 |
sudo reboot |
Installing VMware Tools as OSP
Alternatively, you can install VMware Tools as Operating System Package. This method to install VMware Tools works for old OS versions, and I am unsure whether someone may need it these days. If you are one of those guys, check out what VMware says on this matter. In this article, I install OSP on Ubuntu Server alone.
Open the Summary tab, and mount the VMware Tools image.

Go to VM console and mount the cdrom image into the mnt directory. To mount the image successfully, you need to elevate user privileges to root with the sudo prefix.
|
1 |
sudo mount /dev/cdrom /mnt |

Extract the archive with the cmdlet below. In my case, there was quite a massive output, so I did not provide it here.
|
1 |
tar –zxvf /mnt/VNwareTools-* -C /tmp/ |

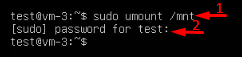
Unmount the image after extraction with this command:
|
1 |
sudo umount /mnt |
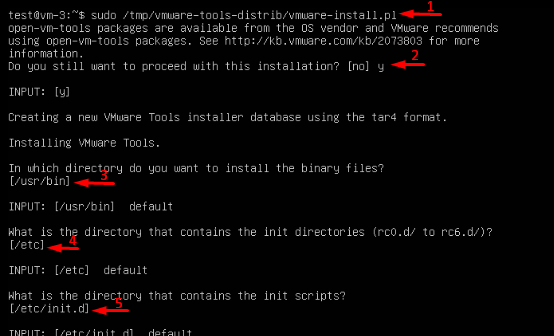
Deploy the installation script next
|
1 |
sudo /tmp/vmware-tools-distrib/vmware-install.pl |
When the system asks you whether you still want to proceed with this installation, type the y key. Afterward, you need to press the Enter key a few times to finish installation.
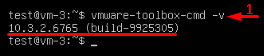
Once you are done with installation, verify whether the process has run smoothly
|
1 |
Vmware-toolbox-cmd -v |
Reboot the server next, and that’s it!
|
1 |
sudo reboot |
For other OS from Linux family that do not have VMware Tools on board, OST installation looks same apart from some individual commands syntax peculiarities.
Conclusion
Today, I discussed how you install VMware Tools on different OS. I wanted to keep things as general as possible without digging into details.
VMware Tools installation is not rocket science and the suite is bundled with some guest OS. Well, if you run an old Linux distributive or there is no VMware Tools installed for some reason, just follow one of those mini guides above.
