

Introduction
Building a virtualized environment with VMware Workstation is a bit different from the scenario discussed before. Today, I use VMware Workstation 15 Pro – a virtualization platform that supports hypervisor virtualization and allows administrating small VMware infrastructures. Yes, Workstation is a vCenter-like platform, but it has rather limited functionality. Anyway, it allows building a vSphere lab for free! This being said, the solution is good for this article.
The toolkit
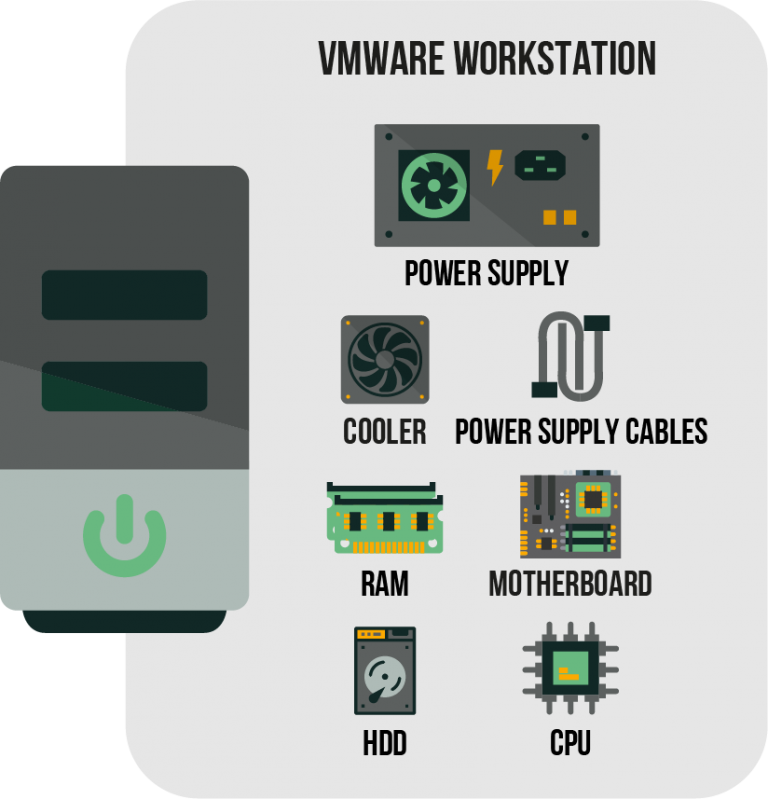
Here’s the configuration of the PC used for today’s study. It is just the same PC that I used before. But, I think that it is good to remind you of its configuration anyway.
- Intel(R) Core™ i7-2600 CPU @ 3.40GHz (CPU);
- Gigabyte Z68X-UD7-B3 (Motherboard);
- 24 Gb (RAM);
- 2 x 1TB (HDD);
- 1 x 1 Gb/s RTL8111E (LAN);
- 1 x 1 Gb/s Intel ® PRO/1000 PT Dual Port Server Adapter (LAN).
Let’s take a look at the scheme of the environment that I build today.
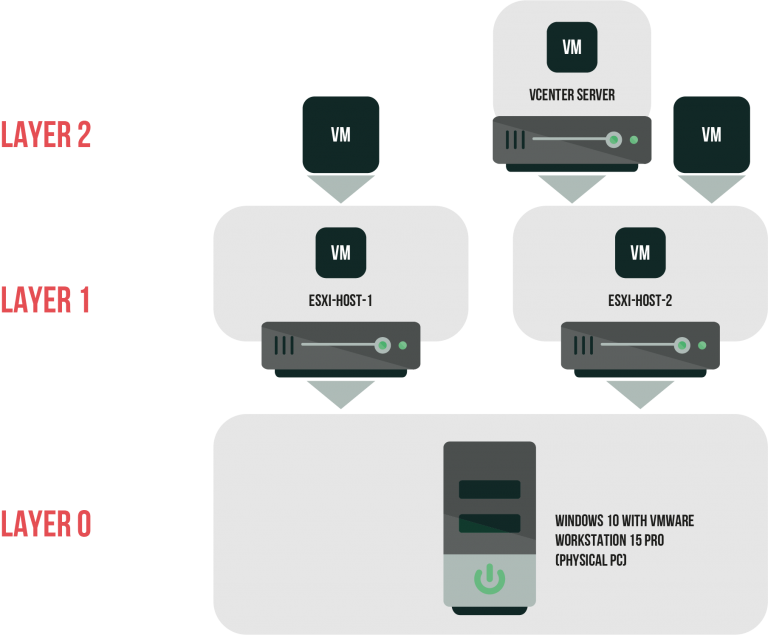
Its architecture has two major differences from the lab created in the previous article.
The main difference about this setup is using VMware Workstation 15 Pro as a hypervisor. You can install VMware Workstation 15 Pro right on top of any OS (today, I use Windows 10), but do not expect to squeeze much performance out of a setup like that. On the other hand, you do not need a separate drive to build this environment. You also do not need a laptop for managing the lab as you can administrate the whole thing right from the Layer 0 host.
Another difference is running only two VMs on Layer 1. vCenter Server requires a dedicated ESXi host, but I did not want to add the third entity on Layer 1. Instead, I installed vCenter Server on a Layer 2 VM. With an architecture like that, I could assign more resource to ESXi hosts. Still, vCenter Server VM consumes most of ESXi-Host-2 resources, making the overall setup performance even worse.
Taking these two differences together, VMware Workstation is great for building a minimalistic home lab for ones who do not care that much about performance. It is a good solution for your first lab. But, one more time, do not expect it to be fast.
Let’s create the lab!
Layer 0
Before you start, register at the official VMware website and download VMware Workstation 15 Pro, ESXi 6.7 U1, and VMware vCenter Server images. You also need to enable CPU virtualization. Here’s how you can do that:
- Reboot your PC and enter BIOS. Here are the common keys to enter BIOS: Del, Ctrl+Alt+Esc, or F2. Note that the next steps may be different for your case, so, take a look at the documentation provided by your motherboard vendor before you start.
- Go to the processor settings. Just find a submenu called like Processor, Chipset, Advanced CPU Configuration, or Northbridge.
- Enable the processor virtualization technology. It is called Intel Virtualization Technology (Intel VT) or AMD-V, depending on which processor you have.
- That’s it! Select Save & Exit to save all settings and leave BIOS.
That’s not the case for UEFI-based PCs. If you have one in your lab, learn what your motherboard vendor says on enabling CPU virtualization.
INSTALLING VMWARE WORKSTATION
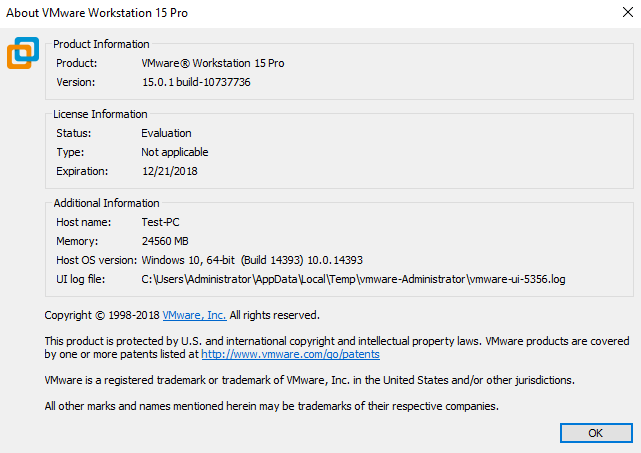
Next, install VMware Workstation 15 Pro. Learn more about VMware Workstation installation requirements here: https://www.vmware.com/products/workstation-pro/faqs.html#installation.
Once VMware Workstation is installed, you can enjoy a fully functional virtualization platform for 30 days for free.
Now, configure the setup and specify its location, and you can finally start with creating Layer 1 VMs!
Layer 1
On Layer 1, I have 2 VMs with the same configuration (except of amount of RAM):
- 8 x Intel ® Core ™ i7-2600 CPU @ 3.40GHz (CPU);
- 1 x 8 Gb (RAM) for ESXi-Host-1 and 1 х 14 Gb (RAM) for ESXi-Host-2;
- 1 x 400 GB (HDD);
- 1 x VMware Paravirtual (SCSI controller);
- 1 x 10 Gb/s (VMXNET 3 LAN).
The VM configuration used in this article is a bit different from one that I used before:
- 8 x Intel ® Core ™ i7-2600 CPU @ 3.40GHz (CPU);
- 1 x 8 Gb (RAM);
- 1 x 300 GB (HDD);
- 1 x VMware Paravirtual (SCSI controller);
- 1 x 10 Gb/s (VMXNET 3 LAN)
As you can see, I provide the VM that hosts vCenter Server with more RAM and a virtual disk of larger capacity.
Now, let’s move to VM creation. To avoid making this article a long-read, I decided to highlight only some important steps. If you still need help with VM creation in Workstation environment, take a look at VMware’s guide.
While configuring a VM select the Custom (advanced) option. Otherwise, you won’t be able to use several features.
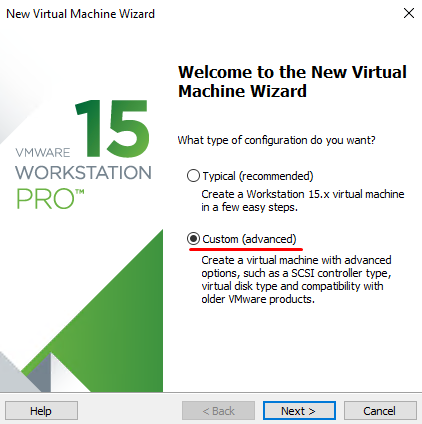
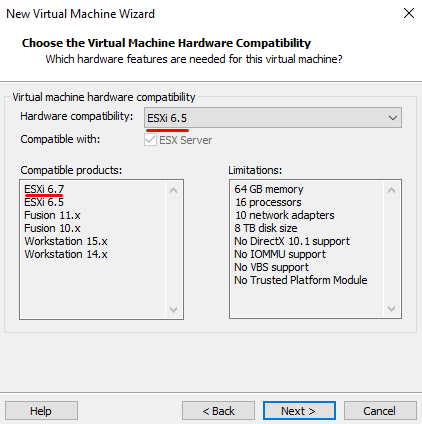
Be careful and select the right VM hardware compatibility.
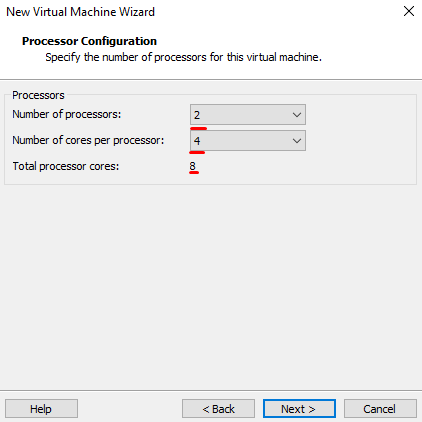
For both VMs, set the maximum number of cores that they can use. The number of sockets and cores does not matter, but it still should not exceed the maximum number of vCPUs.
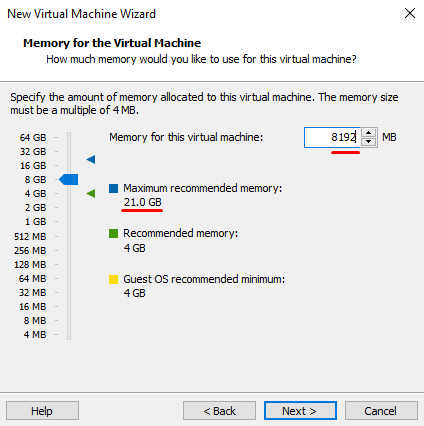
Now, let’s assign some RAM to the VMs. Remember that you have 2 ESXi hosts. Distribute the available resources wisely. For my setup, I assigned 8GB and 14 GB of RAM to each VM. Keep in mind that you can always change the amount of RAM assigned to the particular VM in its settings.
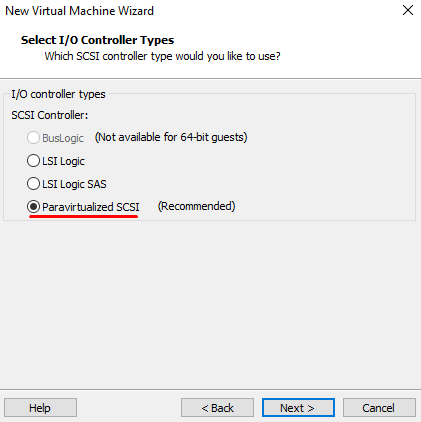
At the next step, decide on the SCSI controller type. Just select Paravirtual SCSI.
Now, you need to allow your virtualized environment to communicate with other devices. In the Network Type dialog, tick the Use bridged networking option. Note that bridged networking involves an external DHCP service. If it is unavailable, you need to set IPs manually. Otherwise, you can use network address translation or host-only networking. If you are uncertain which option you need, check what VMware says on this matter.

Eventually, enable Intel VT-x or AMD RVI.

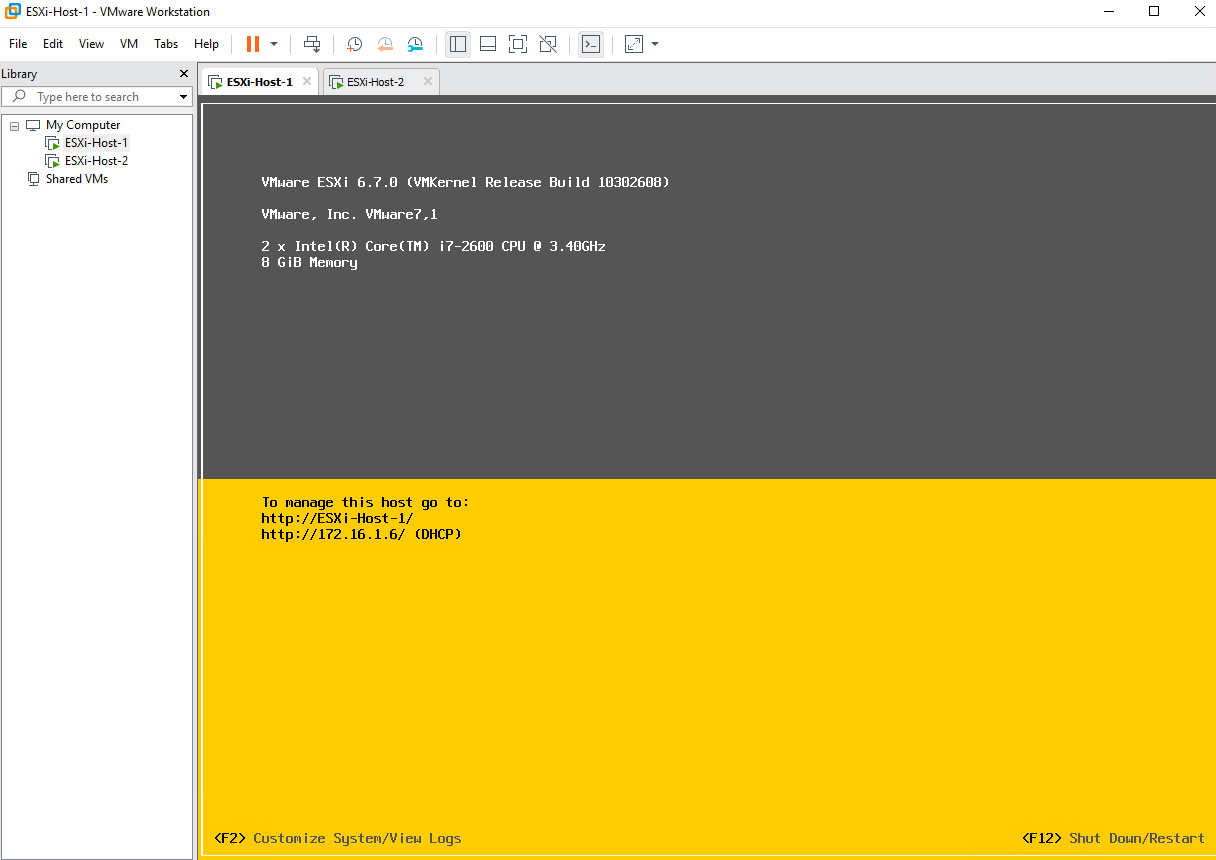
Now, you need to install ESXi on both hosts.
Layer 2
Eventually, you need to install vCenter Server on the host that has more RAM and larger virtual disk (ESXi-Host-2 in my setup). Spawn some VMs, and your lab is good to go! If you need more details on how you can create Layer 2 VMs, look through my previous article.
Conclusion
This article series describes how to build a conditionally free home lab using just a PC and some additional gear like a switch and an external NIC. The nice thing about both setups is, you can run them for free for some time! This being said, be smart and do not use free solutions for running production environments. THEY ARE ONLY FOR LABS! Go ahead and start building your own one!