

Introduction
NIC or ports teaming in ESXi allows the hypervisor to share traffic among the physical and virtual networks, thereby increasing the bandwidth of vSphere virtual switch or a group of ports. It allows to load balance network traffic in the event of a hardware or network failure. Configuring the load balancing policy enables you to decide how exactly a standard switch is going to load balance the traffic between the physical NICs.
The team load balancing policy specifies how the virtual switch will load balance the traffic between the groups of ports. Nevertheless, there’s, of course, a catch. In case the established load balancing policy doesn’t match the networking equipment your host is connected to, there’ll be problems connecting your recently configured ESXi.
The team load balancing policy specifies how the virtual switch will load balance the traffic between the groups of ports. Nevertheless, there’s, of course, a catch. In case the established load balancing policy doesn’t match the networking equipment your host is connected to, there’ll be problems connecting your recently configured ESXi. This is precisely when the ability to configure the load balancing policy through the ESXi console has a moment to shine. It’s even more useful if a host is at a remote location. The point is, a lot of people think that not being able to ping the host is the end of the story. In most cases, this is quite possible, but if you still can console into the ESXi host through out-of-band remote management (IDRAC or else), all is not lost.
What are the choices?
Now, before we get started, let’s check what the load balancing options in ESXi are. To continue our work, you need to tell the difference between them:
- Route Based on Originating Port ID – Load Balancing option based on the virtual port ID on the switch. It’s a default option. When vSwitch receives traffic from introduced objects, it assigns a virtual port and a physical NIC for data transmission. One virtual adapter can only use one NIC at a time. This physical port does not change until the VM is deleted or migrated over to another host.
- Route based on IP hash – Load Balancing option based on hashing the source and destination IP addresses. Traffic from one virtual machine goes to vSwitch that is servicing multiple IP addresses, the load balancing policy hashes the source and destination IP addresses and distributes the connection to different NICs.
- Route based on source MAC hash – Similar Load Balancing option based on hashing MAC-address of the source. It used to be a default option in the earlier ESX Server versions.
Troubleshooting through the ESXi Console
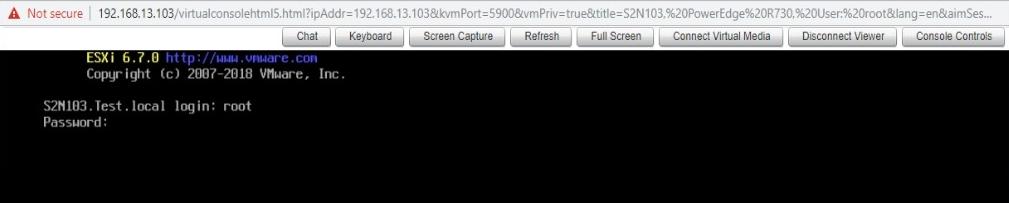
Connect to the host through the remote management solution (mine is IDRAC) and log in to the console. After the connection is established, get to the DCUI (Direct Console User Interface):

As the next step, press ALT + F1 to get to the console login. Log in using your ESXi credentials.
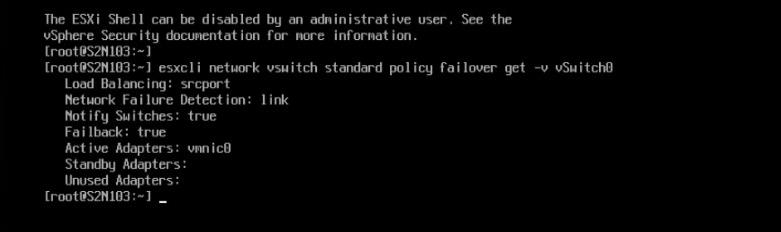
To check the current load balancing policy for each vSwitch adapter, use the following command:
|
1 |
esxcli network vswitch standard policy failover get -v vSwitch0 |
As an example, further, I’ll be using vSwitch0 since each ESXi host has a virtual interface vSwitch0 by default:
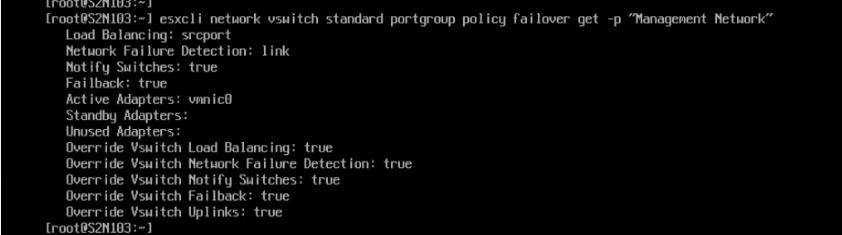
Now, if the port group is set to override the vSwitch load balancing settings, well, then you’ll have a bit of a problem. When set your load balancing on the “vSwitch0,” there’s a possibility for you to find out the load balancing on the “Management Network” port group, and you can’t connect to the host. In order to look for the load balancing settings per each port group use the following command:
|
1 |
esxcli network vswitch standard portgroup policy failover get -p "Management Network" |
In my case, this is the “Management Network” port group that is also set by default on every ESXi host:
To change the load balancing policy, you need to assign a specific policy to a NIC or a group of ports:
- explicit – according to the list
- portid – based on the originating virtual port
- mac – on source MAC-hash
- iphash – based on IP-hash
So, let’s say, if you need to to change the load balancing policy over to “Route based on IP hash,” you’ll be needing this command:
|
1 |
esxcli network vswitch standard policy failover set -l iphash -v vSwitch0 |

However, that’s not all yet, you might need to change the load balancing policy on the port group as well, for which use this command:
|
1 |
esxcli network vswitch standard portgroup policy failover set -p "Management Network" -l iphash |

Conclusion
This method has helped me once to reanimate a newly deployed host that was disconnected due to the load balancing policy error. Removing the problems with the connection to the host by changing the load balancing policy may be quite useful, especially through ESXCLI. You won’t have any issues if you know the basics on the different load balancing options and how to configure a physical switch.
If you know how to connect to the host remotely or have a similar experience, you’re welcome to share it in the comments.
